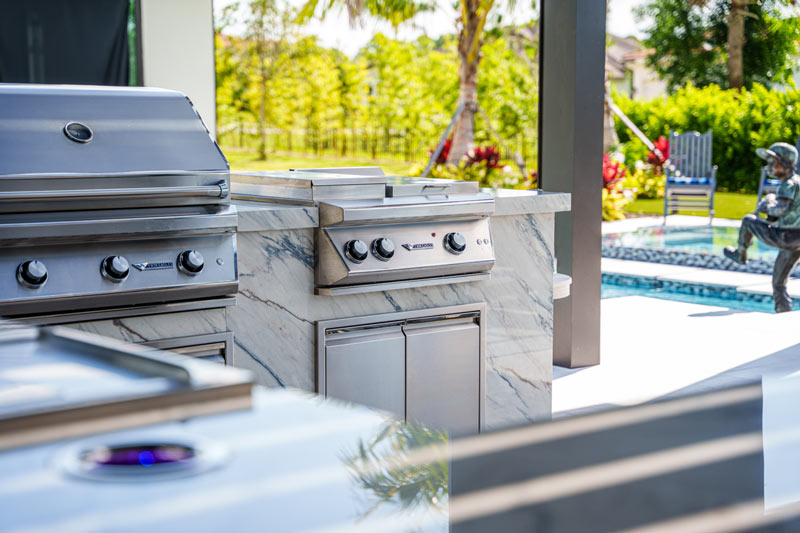
A BBQ grill is more than just a cooking appliance. It’s the heart of your outdoor kitchen, a place where delicious meals are created and memories are made.
But to keep your grill performing at its best, regular cleaning is essential. This is especially true for the grill’s exterior, which is often overlooked in the cleaning process.
Cleaning the outside of your BBQ grill not only enhances its appearance but also extends its lifespan. It helps prevent rust, corrosion, and damage from the harsh South Florida climate.
This comprehensive guide will walk you through the process of cleaning the outside of your BBQ grill. It will provide you with step-by-step instructions, safety precautions, and tips for maintaining your grill’s exterior.
Whether you’re a seasoned grill master or a novice outdoor cook, this guide will help you keep your grill looking and performing its best. So, let’s dive in and learn how to clean the outside of a BBQ grill.
Why Cleaning Your BBQ Grill Exterior is Essential
Outdoor grills face numerous challenges. The outside of your BBQ grill is exposed to the elements. Sun, rain, and salty air in South Florida can cause significant wear.
Over time, dirt, grease, and grime can accumulate. These substances don’t just make your grill look unsightly; they can also damage it. If left unchecked, grime can lead to rust.
Rust and corrosion can weaken your grill’s structure. Once metal starts to rust, it can be hard to stop the spread. Regular cleaning is your first line of defense.
In addition to prolonging the grill’s life, a clean exterior contributes to safety. Built-up grease and dirt can pose a fire hazard. Cleaning ensures safer, more enjoyable cooking.
A clean grill exterior also enhances your outdoor kitchen’s overall look. It maintains the aesthetic appeal and value of your home. Frequent cleaning preserves functionality and adds charm to your outdoor space.
Preparing for the Clean-Up: Safety First
Before diving into the cleaning process, prioritize safety. Ensuring your grill is safe to clean is crucial. Begin by making sure the grill is completely cool.
Safety also means disconnecting any gas supply. Turn off the propane tank or gas line. This reduces the risk of leaks or accidents during cleaning.
Wearing appropriate safety gear is essential. Gloves and eye protection provide a layer of protection against cleaning chemicals. Choose non-toxic cleaners whenever possible.
Here’s a quick checklist to ensure a safe cleaning process:
- Confirm the grill is cool to the touch.
- Disconnect all gas supplies.
- Wear protective gloves and goggles.
- Use well-ventilated space for cleaning.
- Select non-toxic, gentle cleaning agents.
Taking these precautions keeps you safe while working. Safe practices allow you to focus fully on revitalizing your grill’s exterior. Following this approach ensures a smoother, worry-free cleaning experience.
Tools and Materials You Will Need
Starting with the right tools makes all the difference. Having quality materials ensures effective and efficient cleaning. This investment saves you time and effort.
Selecting the appropriate materials depends on your grill type. Stainless steel, porcelain, or cast iron grills may require varied approaches. Tailoring your tools will provide the best results without damage.
Collect your cleaning kit before you begin. Here’s a list of necessary items:
- Soft cloth or microfiber towels
- Non-abrasive sponge or brush
- Mild dish soap or specialized grill cleaner
- Baking soda and vinegar for DIY cleaning solution
- Bucket with water
- Garden hose for rinsing
- Optional: Stainless steel polish for finishing touches
Organizing your tools before starting streamlines the cleaning process. A well-prepped work area can make the process more enjoyable. You’ll achieve a pristine finish with the right tools in hand.
Step-by-Step Guide to Cleaning the Outside of Your Grill
Step 1: Cool Down and Disconnect
Ensure the grill is completely cool before starting. Cleaning a hot grill can be dangerous.
Disconnect the grill from any gas supply if applicable. This step is crucial for safety during the cleaning process.
Step 2: Wipe Down the Surface
Begin with a clean, damp cloth to remove loose dirt and debris. This initial wipe clears away surface dust.
Pay special attention to corners and crevices. These areas often collect the most grime over time.
Step 3: Apply Cleaning Solution
Spray your chosen grill cleaner evenly across the surface. Ensure thorough coverage, especially on greasy spots.
Alternatively, a mixture of baking soda and vinegar works well. This DIY solution is effective and environmentally friendly.
Step 4: Tackle Tough Stains and Grease
For stubborn stains, use a non-abrasive sponge or brush. Gently scrub the grill’s exterior to prevent scratches.
Reapply the cleaning solution if necessary. Some spots may require multiple applications for best results.
Step 5: Rinse and Dry
Rinse the surface with a garden hose or clean water. Ensure all cleaning solution residue is completely washed away.
Dry the grill thoroughly with a microfiber towel. This step prevents water spots and keeps the finish looking fresh.
Step 6: Polish for a Perfect Finish
For stainless steel grills, apply a stainless steel polish. This adds shine and further protects the surface.
Polishing makes the grill look brand new. It enhances the overall aesthetic of your outdoor kitchen.
Maintaining Your Grill’s Exterior Post-Cleaning
Regular maintenance is key to preserving your grill’s aesthetic appeal. Wipe down the grill after each use to prevent buildup. This simple step keeps grease and grime at bay.
Utilizing a protective grill cover is essential. Make sure the cover is both UV-resistant and waterproof. This prevents weather-related damage, especially in harsh climates like South Florida.
Inspect the grill periodically for signs of wear or rust. Address any issues immediately to prevent further damage. Consistent attention ensures your grill stays in prime condition for years.
Seasonal Maintenance Tips for South Florida Climates
South Florida’s climate poses unique challenges for outdoor grills. The high humidity and salt air can cause rust and corrosion. It’s crucial to adapt your maintenance routine to these conditions.
Before summer arrives, give your grill a thorough inspection. Look for any signs of rust or wear and address them promptly. This prepares your grill for the busy grilling season.
Invest in quality covers to protect your grill from rain and intense sun. Covers shield against UV rays and reduce moisture buildup. They help in extending the lifespan of your outdoor kitchen equipment.
When to Call in the Professionals
Sometimes, a DIY approach isn’t enough. If you notice persistent rust spots, deep scratches, or structural issues, it’s time to consult a professional. Expert services can handle tougher problems and ensure a comprehensive clean.
Furthermore, if your grill has specific needs that a manual can’t solve, professionals offer tailored solutions. Routine professional maintenance extends your grill’s life and enhances performance. It’s a worthy investment in the long run.
Conclusion: Enjoying Your Sparkling Clean Grill
A clean grill isn’t just about looks; it enhances your cooking. Regular maintenance keeps your BBQ experience safe and enjoyable. By investing time in cleaning, you ensure better-tasting food and a longer lifespan for your grill.
Remember, consistency is key. Make cleaning part of your grilling routine. This commitment keeps your grill in top shape and elevates your outdoor cooking to new heights. Enjoy every cookout with the confidence of a fresh and well-maintained BBQ grill.